Crème Brûlée – Or “Creme Brulee” if you don’t have the accents.
Crème Brûlée
Four ingredients, a bain-marie, the most satisfying sound in all of dessert cooking, and a dessert that has been argued over by three countries for three centuries. The French won the naming rights. The tap of the spoon belongs to everyone.
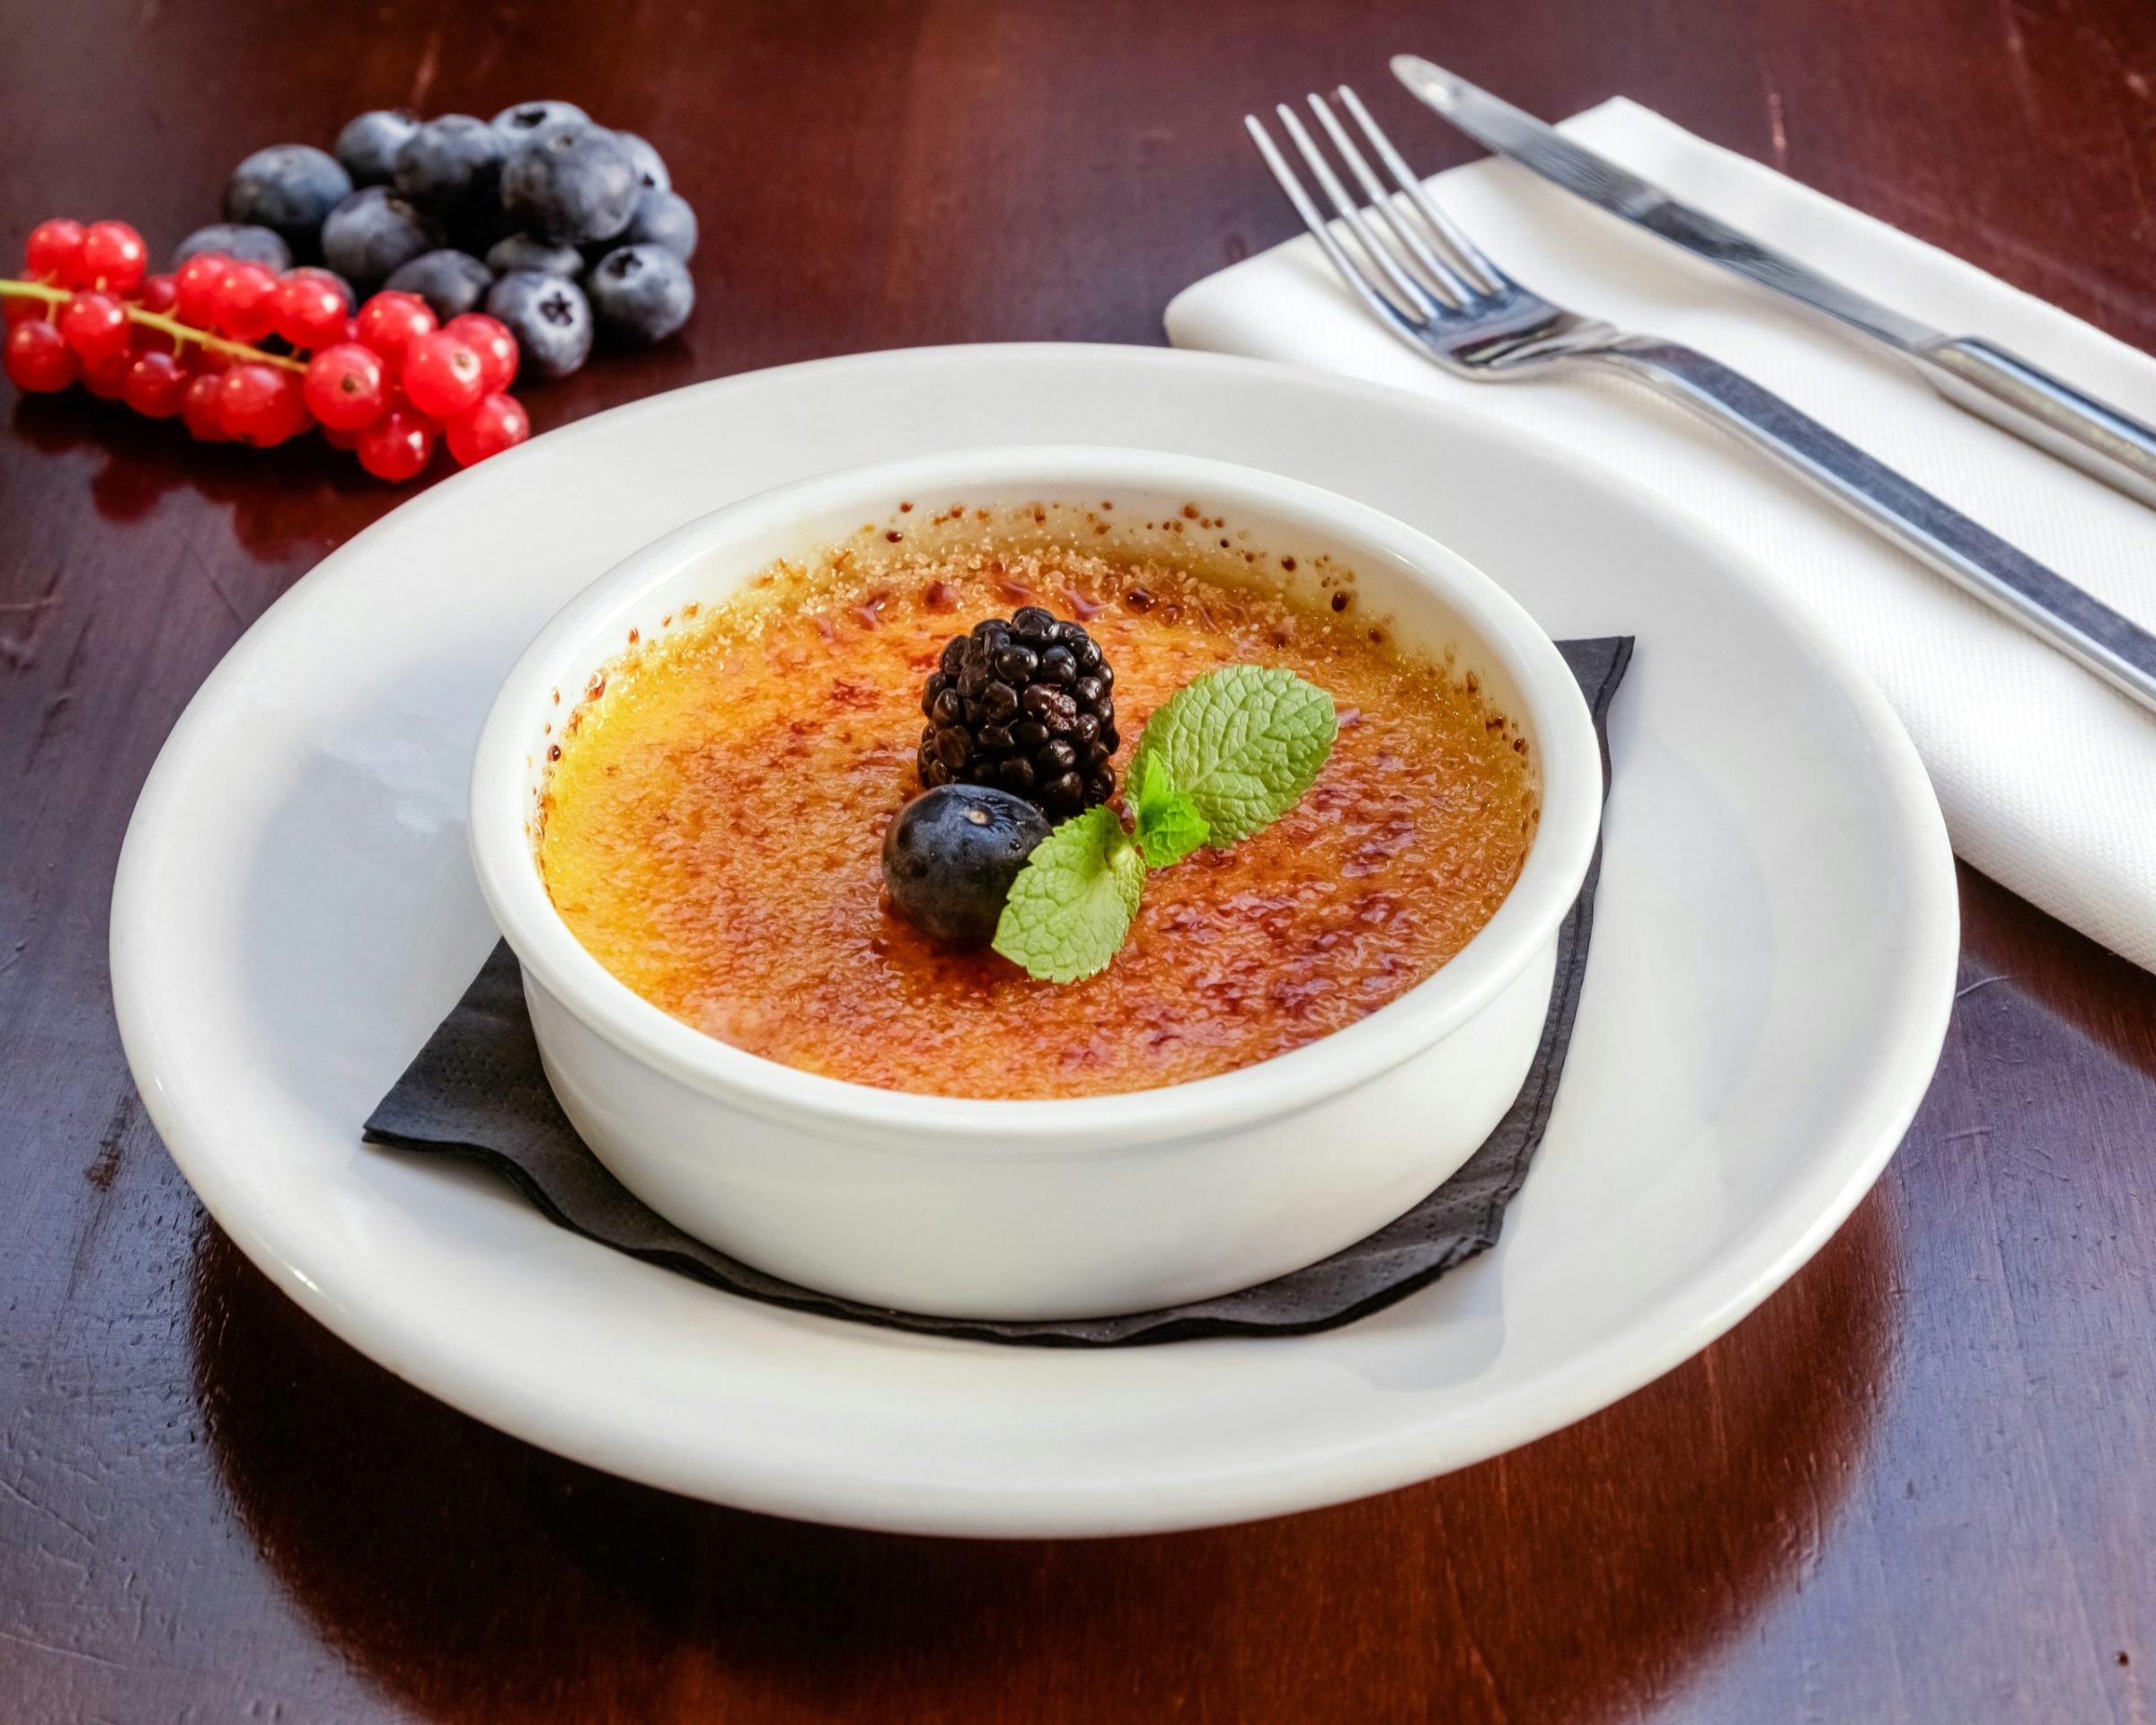
There is a particular kind of silence that falls at a dinner table in the moment before a spoon cracks through a crème brûlée. Everyone knows what is coming. The thin sheet of amber caramel, still warm from the torch, gives way with a sound somewhere between a snap and a sigh, and underneath it the cold vanilla custard sits perfectly undisturbed, pale and scented and utterly calm. It is, for a dessert of four ingredients, a moment of considerable drama.
I have made this more times than I can count and the drama never diminishes. It is one of those dishes that gives the same pleasure at the fifteenth making as at the first, which is rarer than it sounds. And it is, in spite of a reputation for difficulty that I would like to gently dispute, one of the most manageable desserts in the repertoire, because almost everything happens the day before. By the time your guests arrive the hard work is already done and in the fridge, and the brûlée itself takes less than a minute.
Who Made It First
Three countries, and they have been arguing about this since the seventeenth century.
The French case rests on a 1691 cookbook called Le Cuisinier Royal et Bourgeois by François Massialot, a chef who worked for the court of Louis XIV, in which a recipe remarkably close to the modern dish appears. The English call it burnt cream, and Trinity College Cambridge has served its own version since at least the eighteenth century, historically branding the college crest into the caramel with a heated iron, which is the kind of institutional detail the English tend to be rather proud of. The Spanish point to crema catalana, a custard of medieval origin flavoured with citrus and cinnamon rather than vanilla, with the same burnt-sugar crust.
The honest answer is that nobody really knows, and that the question is possibly less interesting than the thing itself. What the three versions share is the foundational insight — cool, rich custard and hot, brittle caramel are made for each other — and that insight is as true now as it was in 1691. The French, at least, won the naming rights, and crème brûlée, burnt cream, is the name the whole world uses.
What It Actually Is
Crème brûlée is a custard, which means it is an emulsion of cream and egg yolks set by gentle heat. The vanilla is not an addition; it is the flavour of the thing, and the quality of the vanilla matters considerably. A good vanilla pod, split and scraped and steeped in warm cream, produces a custard with flecks of black seed and a depth of flavour that extract simply cannot match. Use a pod. The cream should be double cream, full fat, which gives the finished custard its particular richness and texture. The egg yolks should be at room temperature.
The bain-marie is not optional and not fussy: it is the single technique that makes this dessert work. By surrounding the ramekins with water in the oven, you cap the maximum temperature the custard can reach at around 100°C, because water cannot exceed its boiling point. This gentle, even heat is what produces a smooth, silky custard rather than a grainy, scrambled one. A crème brûlée baked directly in the oven, without water, sets too fast and too hot at the edges and produces a texture that is fine but not quite right. The bain-marie takes an extra thirty seconds to set up and makes a material difference to what arrives at the table.
The wobble test is how you know it is done. The edges should have set; the centre should move as a single, unified wobble when the tin is gently shifted. Not sloshing, not liquid, but distinctly mobile. This will look underdone. It is not. The custard will firm to exactly the right consistency as it cools, and then continue to settle overnight in the fridge. Taking it out early is the single biggest mistake most people make: patience here is rewarded completely, and impatience produces runny custard under a perfect caramel, which is disappointing for everyone.
The Brûlée
The caramel on top is the other half of the dish, and it is where a crème brûlée that is merely good becomes one that is properly remembered. The sugar layer needs to be thin and even: a single teaspoon per ramekin, no more, distributed by tilting the dish so every part of the surface is covered. Any thicker and the caramel becomes a slab rather than a sheet, and the tap of the spoon produces a thud rather than a crack.
A kitchen blowtorch is the right tool and worth owning if you make this more than once. Move the flame in small, even circles, watching the sugar bubble and turn from pale gold to deep amber. Stop at amber: dark brown is one step from bitter, and bitter caramel under vanilla custard is a loss. The torch gives you control that a grill cannot match; a grill heats the whole surface at once and can begin to warm the custard underneath, which is precisely what you spent all that careful baking and chilling time preventing.
The brûlée should be done immediately before serving and not a moment earlier. A caramelised top that sits for more than a few minutes begins to draw moisture from the air and soften, losing the crack that is the whole point. This is the one instruction I enforce without exception: make, torch, serve, in that order, with no gap in between.
The Recipe
Serves 4. About 20 minutes’ active work, 35 minutes’ baking, and then patience. The custards are best made the day before.
Ingredients
- 500ml double cream
- 1 vanilla pod, split and seeds scraped
- 5 large egg yolks, at room temperature
- 80g caster sugar, plus 4 tsp extra for the brûlée
The Method
1. Infuse the cream. Pour the cream into a saucepan with the vanilla pod and seeds. Bring just to the point of steaming — tiny bubbles at the edges, not a boil — then remove from the heat and leave to infuse for 15 minutes. Remove and discard the pod.
2. Whisk the yolks and sugar. In a large bowl, whisk the egg yolks and 80g of caster sugar together until just combined and slightly pale. Do not whisk to a foam: too many bubbles in the custard produce an uneven texture in the finished dish.
3. Temper and strain. Slowly pour the warm cream into the egg mixture in a thin, steady stream, whisking constantly. Go slowly at the beginning: adding hot cream too fast to cold yolks scrambles them. Once all the cream is incorporated, strain the custard through a fine sieve into a jug. Skim off any surface bubbles with a spoon.
4. Into the bain-marie. Heat the oven to 150°C (130°C fan). Set four shallow ramekins in a deep roasting tin. Pour the custard into each to about three-quarters full. Pour just-boiled water into the tin until it comes halfway up the sides of the ramekins. Slide carefully into the oven.
5. Bake and watch for the wobble. Bake for 30 to 40 minutes until the edges have set but the centre has a distinct, unified wobble when the tin is gently moved. It will look underdone. It is not. Lift the ramekins out of the bain-marie and leave to cool to room temperature, then cover and refrigerate for at least 4 hours, or overnight.
6. The brûlée. Remove the custards from the fridge. Sprinkle exactly 1 tsp of caster sugar over each, tilting to cover the surface completely. Using a blowtorch, move the flame in small circles until the sugar melts, bubbles and turns deep amber. Leave for 1 to 2 minutes for the caramel to harden. Serve immediately.
A Few Notes Worth Mentioning
On the vanilla: a real vanilla pod makes a material difference to this recipe. The specks of seed in the finished custard are not merely aesthetic; they carry flavour that extract cannot replicate. A good pod split lengthways, seeds scraped and both pod and seeds steeped in the cream, is the version worth making. If vanilla pods are genuinely unavailable, a half teaspoon of very good vanilla paste is the next-best option.
On the sugar for the brûlée: caster sugar and white granulated sugar both work. Caster melts marginally more evenly; granulated gives a very slightly thicker crust with a louder crack. Both are correct. What you should not use is demerara or soft brown sugar, which contain moisture and can bubble and spit under the torch in an unpredictable way, though some recipes call for it specifically as a more forgiving option under a grill. If you are using a grill rather than a torch, this trade-off is worth considering.
On the ramekins: shallow ones, wider rather than deeper, produce a better ratio of caramel crust to custard than tall narrow ones, and a better ratio is the whole point of the dessert. The classic French porcelain ramekin, about 150ml capacity and no more than 3cm deep, is exactly right.
On making ahead: this is one of the very best dinner party desserts precisely because it must be made ahead. The custards keep beautifully in the fridge for up to three days. The brûlée takes sixty seconds per ramekin and requires nothing but a steady hand and the torch. The combination of maximum advance preparation and maximum tableside theatre is, frankly, ideal.
On what it wants alongside: nothing. Crème brûlée is complete on its own, and adding things to it tends to distract from the thing the dessert is specifically about: the contrast between the caramel and the custard, and the moment the spoon goes through. A small shortbread on the side is acceptable if the occasion calls for something to do with your hands. Fruit and cream alongside it are for a different dessert.
This is my own recipe, made many times and adjusted towards what I find gives the best result at home. The history draws on the documented origins of crème brûlée across France, England and Spain.
Recipe Card
Recipe Name: Crème Brûlée
Recipe Description : A classic vanilla crème brûlée with a smooth, chilled custard and a thin amber caramel crust that cracks cleanly beneath the spoon.
Serves: Serves 4
Preparation Time: Approximately 20 minutes active preparation
Chilling & Resting Time: 15 minutes to infuse the cream, plus cooling time and at least 4 hours chilling; overnight recommended
Cooking Time: Approximately 30–40 minutes
Total Time: Approximately 5½–6 hours minimum, including cooling and chilling; ideally prepared the day before
Difficulty: Moderate



Get our latest Delivered
Beautiful recipes, inspiration, guides and news that makes you want to live!