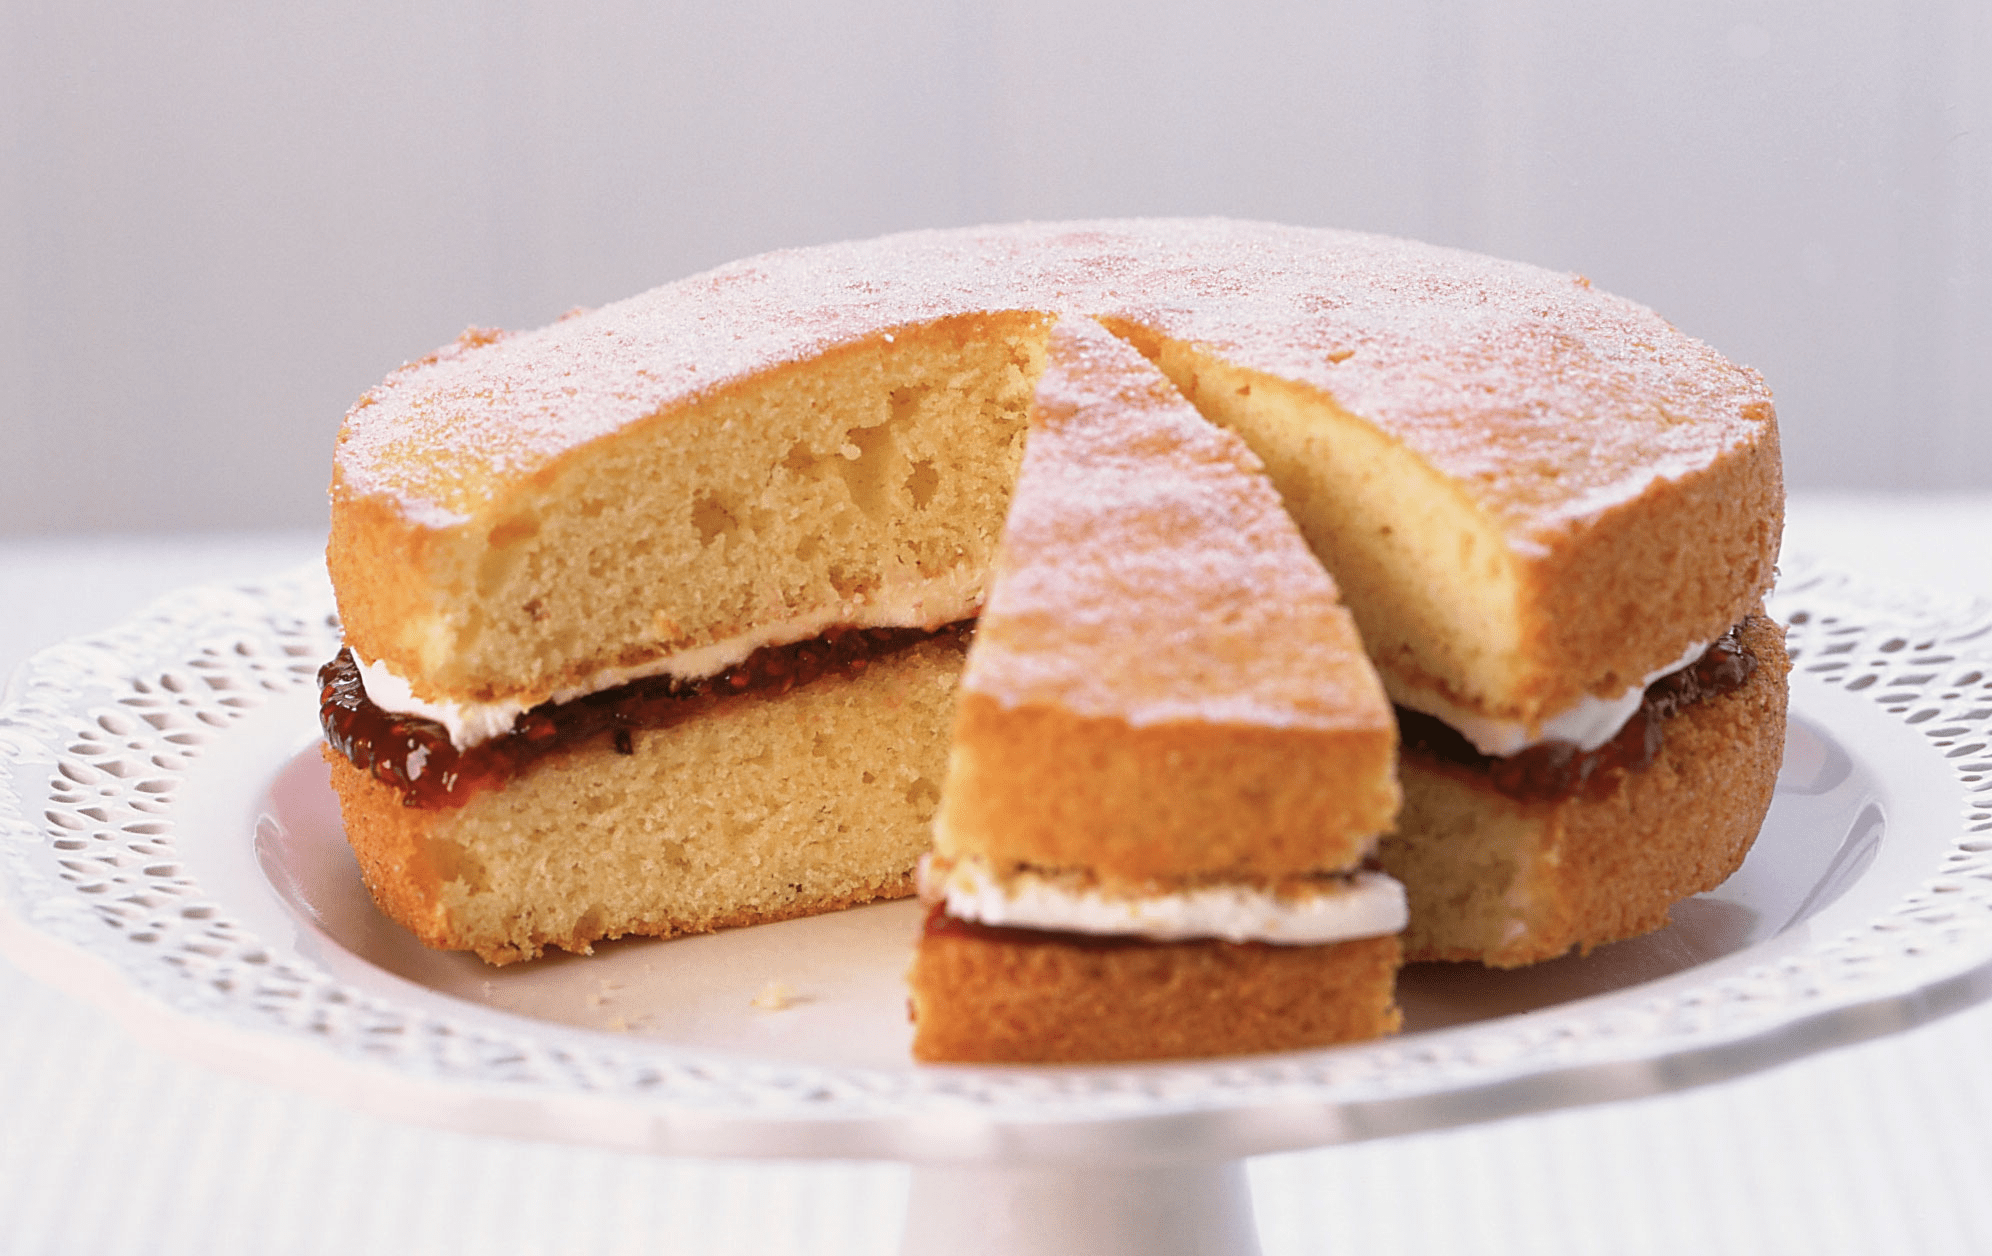
A Reliable Victoria Sponge
A Reliable Victoria Sponge Cake Recipe
The creaming method, equal weights, a proper five minutes given to the butter and sugar, and enough good jam and softly whipped cream inside to make the whole thing feel like an occasion. The recipe every kitchen should have by heart, and the one most kitchens get slightly wrong.
There is a particular kind of recipe confidence that only comes from making the same thing many times and learning, iteration by iteration, exactly where things can go wrong. I have been making Victoria sponge since I was old enough to be trusted with a hand mixer and a 20cm tin, and I have watched it fail in most of the ways it is possible to fail: dense sponges that didn’t rise, sunken centres, curdled batters, undercooked middles, layers that crumbled when filled. Each one taught something. The recipe I make now has been edited down to the fewest possible decisions, each one made deliberately, and it works every time I make it.
The title says reliable, and I mean it. This is not a showstopper. It is not trying to be Battenberg or a drip cake or anything that would require a stand mixer and a piping bag and an afternoon of concentrated effort. It is a good, properly made, genuinely delicious Victoria sponge: two golden sponges filled with good jam and softly whipped cream and dusted with icing sugar, the kind of thing that earns its place at almost any table. It is reliable in the way that matters most, which is that it works, and you can count on it.
Made For A Queen Judged By The WI
Victoria sponge was named, as so many things were in the nineteenth century, in honour of Queen Victoria, who is said to have enjoyed a slice at afternoon tea. The story is probably embellished — Queen Victoria enjoyed a great many things at afternoon tea and not all of them have been named after her — but the cake is real enough, and the association stuck. By the early twentieth century the Victoria sponge had become the standard by which British home baking was judged, and no organisation made this more apparent than the Women’s Institute, whose show schedules list the Victoria sponge alongside the various jams and chutneys and pickles as one of the definitive tests of a domestic baker’s competence.
The WI judge’s requirements are famously exacting and in some cases famously restrictive. In the strictest interpretation: two even sponges of equal height, no decoration, no cream, jam only, icing sugar dusted on top and nowhere else. The judges at county shows have been known to measure the height of each sponge layer with a ruler and to tap the top of the cake to assess the evenness of its crumb structure. This level of seriousness about a cake that a child can make in theory is either admirable or alarming depending on your temperament, but it has produced an extraordinarily clear body of knowledge about what a Victoria sponge should be, and most of it is correct.
My version departs from the WI standard in one respect: I add whipped cream to the filling, which places it firmly in the “occasion sponge” camp rather than the “show sponge” camp. This is a deliberate choice rather than ignorance of the rules. A Victoria sponge with cream in it is a more generous thing, and generosity is rather the point of making one.
The Ratio
The Victoria sponge ratio is one of the things that has been established so thoroughly by a century of domestic baking that departing from it produces, reliably, an inferior cake. Equal weights of butter, caster sugar, eggs and self-raising flour. That is the recipe, fundamentally, and everything else is decoration. The reason the ratio works is that each of the four elements is doing a specific structural job: the fat carries flavour and tenderness, the sugar aerates when creamed with the fat and also provides sweetness and colour, the eggs provide protein and structure and moisture, and the flour provides the framework that holds everything together. Change the ratios significantly and the balance of these functions shifts, and the cake tells you so.
The practical implication of the equal-weight principle is simple: weigh your eggs in their shells before you start, check that they are close to 225g, and if they are significantly lighter, adjust the other ingredients to match. Four large eggs is generally right, and a large free-range egg weighs approximately 55 to 60g in its shell. If your eggs are small, use five. The flour and the sugar and the butter are the easy part. The eggs are the variable.
The Creaming Step
Here is where most Victoria sponges fail, and where this recipe insists on patience.
The creaming step — beating butter and sugar together before anything else is added — is the step whose duration determines the texture of the finished cake. The air incorporated into the fat during creaming is the primary leavening agent in a Victoria sponge, more important than the baking powder, and it can only be beaten in during this step. It cannot be added back later. If you cream the butter and sugar for two minutes, you will have a two-minute cake. If you cream them for five minutes, you will have a five-minute cake, and the difference between the two is the difference between a pleasant dense sponge and the light, open, cloud-like crumb that a good Victoria sponge should have.
The signs that you have creamed long enough are specific and worth knowing: the mixture should be very pale, close to white rather than yellow, and it should have increased noticeably in volume. When you run a spatula through it the mixture should feel light and airy, not heavy and solid. It should look almost mousse-like. If it still looks like pale yellow paste, it needs more time. The mixture will not cream itself if you are not watching it, and the timer on the recipe card is a minimum rather than a sufficient condition.
The butter must be genuinely soft for this to work. Not warm, not melted — soft. Soft enough that it yields completely when you press it, soft enough to leave a clean indentation without resistance. Cold butter, however long you beat it, will never achieve the right texture, and the resulting cake will tell you so with a flat, dense crumb that no amount of good jam can rescue. Take the butter out of the fridge at least an hour before you start, ideally more, and do not try to accelerate this by warming it in the microwave, which melts rather than softens and produces a greasy, unusable result.
The Eggs And The Curdling Question
Eggs added too quickly to creamed butter and sugar will curdle the mixture, which is the moment most recipes cause most anxiety and most bakers add all their eggs at once to get it over with. The solution is slower, not faster: a tablespoon of beaten egg at a time, beaten well after each addition, with a heaped teaspoon of flour added with each addition of egg to stabilise the emulsion. This is slightly more laborious than cracking four eggs into the bowl and beating everything together, and it is considerably more reliable.
If the mixture does start to look slightly grainy or separated despite this care — it can happen in a cold kitchen or with eggs taken directly from the fridge — add a tablespoon of flour and beat on low speed and it will almost always come back together. The flour is a practical intervention rather than an alteration of the recipe.

The Flour And Why You Do Not Beat It
The flour goes in last and must be folded rather than beaten. The reason is the same as the reason for the gentle hand with any sponge: gluten. Flour develops gluten when agitated in a wet mixture, and gluten makes baked goods tough. Folding gently rather than beating keeps the gluten development minimal and the crumb tender. Use a large metal spoon rather than a rubber spatula — the metal cuts through the batter more cleanly — and use the minimum number of strokes necessary to incorporate the flour without leaving visible streaks. An overmixed Victoria sponge batter will produce a noticeably tougher cake, and it cannot be corrected once the flour is in.
The Recipe
Makes one 20cm two-layer cake, serving 8. About 20 minutes’ active work and 25 minutes’ baking.
Ingredients
For the sponge
- 225g unsalted butter, very soft
- 225g caster sugar
- 4 large eggs, at room temperature, beaten
- 1 tsp vanilla extract
- 225g self-raising flour, sifted
- 1 tsp baking powder
- 1 to 2 tbsp whole milk, if needed
For the filling
- 4 tbsp good quality strawberry or raspberry jam, seedless if possible
- 300ml double cream
- 1 tbsp icing sugar, plus more to dust the top
The Method
- Prepare the tins. Heat the oven to 180°C (160°C fan). Grease two 20cm sandwich tins and line the bases with baking paper.
- Cream the butter and sugar — properly. Beat the butter alone for 2 minutes until smooth and creamy. Add the sugar and beat on medium-high speed for a full 5 minutes, scraping down the bowl halfway through. The mixture should be very pale, almost white, and increased substantially in volume. This step cannot be hurried.
- Add the eggs gradually. Beat the eggs with the vanilla extract. Add the egg mixture to the butter and sugar a tablespoon at a time, beating well after each addition and adding a heaped teaspoon of the sifted flour with each addition of egg.
- Fold in the flour. Sift the remaining flour and the baking powder over the mixture and fold in gently with a large metal spoon until just combined. If the batter is stiff, add milk a tablespoon at a time until it falls reluctantly from the spoon.
- Divide the batter equally between the two tins — weigh them if in doubt. Spread level and bake for 20 to 25 minutes until golden, springy when pressed and a skewer comes out clean.
- Cool completely. Leave in the tins for 5 minutes, then turn out onto a wire rack. Cool completely before filling.
- Fill and finish. Whip the cream with the icing sugar to soft, billowing peaks. Spread the jam over the bottom sponge, spoon the cream generously on top, and place the second sponge on. Dust with icing sugar and serve the same day.
A Few Notes Worth Knowing
On the jam: use something with real fruit and real flavour. Strawberry is the classic, raspberry is arguably better, and a high-fruit-content jam from a decent producer makes a noticeable difference to a cake with so few other flavours competing. The WI judges of the world would say no seeds; I am not strongly opposed to seeds, but they do make the filling messier to cut. Seedless is tidier.
On the cream: whip it to soft peaks rather than stiff ones. A stiff, over-whipped cream is easier to spread but less pleasant to eat, with a slightly grainy texture that the sponge does not deserve. Stop when the cream holds its shape but still feels lush and billowing. A tablespoon of icing sugar in the cream stabilises it slightly and adds just enough sweetness without making it a buttercream.
On the day: Victoria sponge with cream in it is a same-day cake. The cream begins to soak the sponge after a few hours and the texture changes, becoming heavier and more pudding-like, which is not unpleasant but is not quite what it was meant to be. If you need to prepare ahead, make the sponges the day before, wrap them well, and fill them on the day.
On the oven: all ovens behave slightly differently, and a fan oven at 160°C may behave differently from yours. Start checking at 20 minutes and trust the signs rather than the timer: golden top, springy centre, clean skewer, slight shrinkage from the sides of the tin. If the top is browning before the centre is set, cover loosely with foil and continue baking.
On getting it wrong: if the sponge sinks in the middle, it was underbaked, or the oven door was opened too early. If it is dense and flat, the butter and sugar were not creamed long enough or the butter was too cold. If it is tough, the flour was overworked. All of these are correctable next time, and a dense or slightly sunken Victoria sponge covered in cream and dusted with icing sugar is still, in my experience, eaten without complaint.
This is my own recipe, made many times and adjusted to the version that works most reliably in my own kitchen.
Recipe Card
Recipe Name: A Reliable Victoria Sponge
Recipe Description : A classic British Victoria sponge with two light golden cake layers, good fruit jam and softly whipped cream, finished simply with a dusting of icing sugar.
Serves: Makes one 20cm two-layer cake, serving 8
Preparation Time: Approximately 20 minutes active preparation
Chilling & Resting Time: 5 minutes cooling in the tins, followed by approximately 45–60 minutes cooling completely before filling
Cooking Time: Approximately 20–25 minutes
Total Time: Approximately 1 hour 30 minutes to 1 hour 45 minutes
Difficulty: Moderate


Get our latest Delivered
Beautiful recipes, inspiration, guides and news that makes you want to live!